Ladybug plush for The Sensory Project
The ladybug was a lot of fun to make. I wanted to share with you some “making of” pictures so you get a better idea of how it was constructed. Maybe it will help you with a future project.
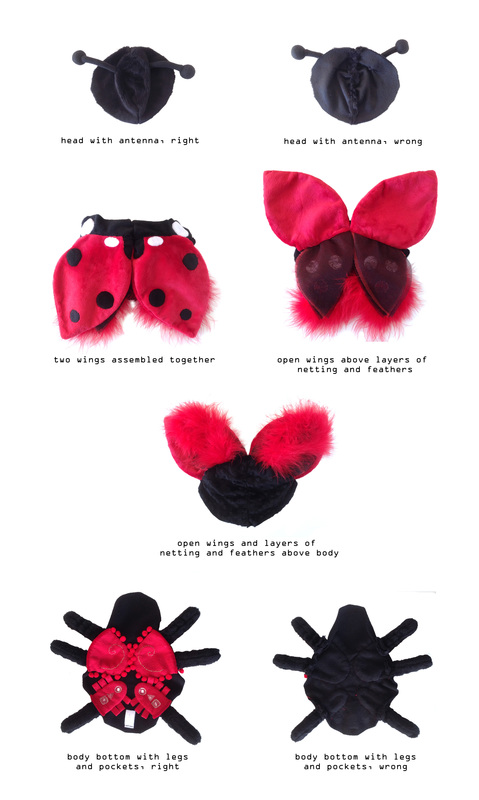
Here are the main pieces that make up the ladybug. When I say “head right”, right means right side of the fabric (nap side, the side you want to be on the outside of the plush).

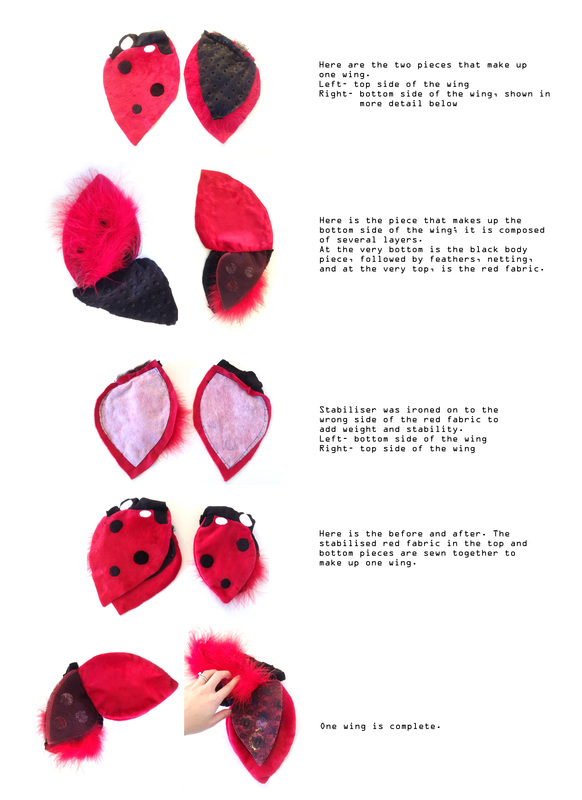
When you open up the wings on the ladybug, I wanted there to be layers of netting and feathers to surprise you and to stimulate the senses. The multitude of layers involved meant that the wing was one of the most complicated parts to construct. The way I did it was to sew onto the bottom red fabric piece, the feathers, layers of netting, and the black piece that forms the body. Then, the two red fabric pieces were stabilised, and sewn together to form one wing. You can see this below. When you do it step by step, it’s not difficult.
I repeated the same process with the second wing and sewed those together along the middle of the two black body pieces. Once this was done, I assembled the head (attaching the antenna), and the bottom of the body (attaching the pockets and the legs). Below you can see the assembled pieces.
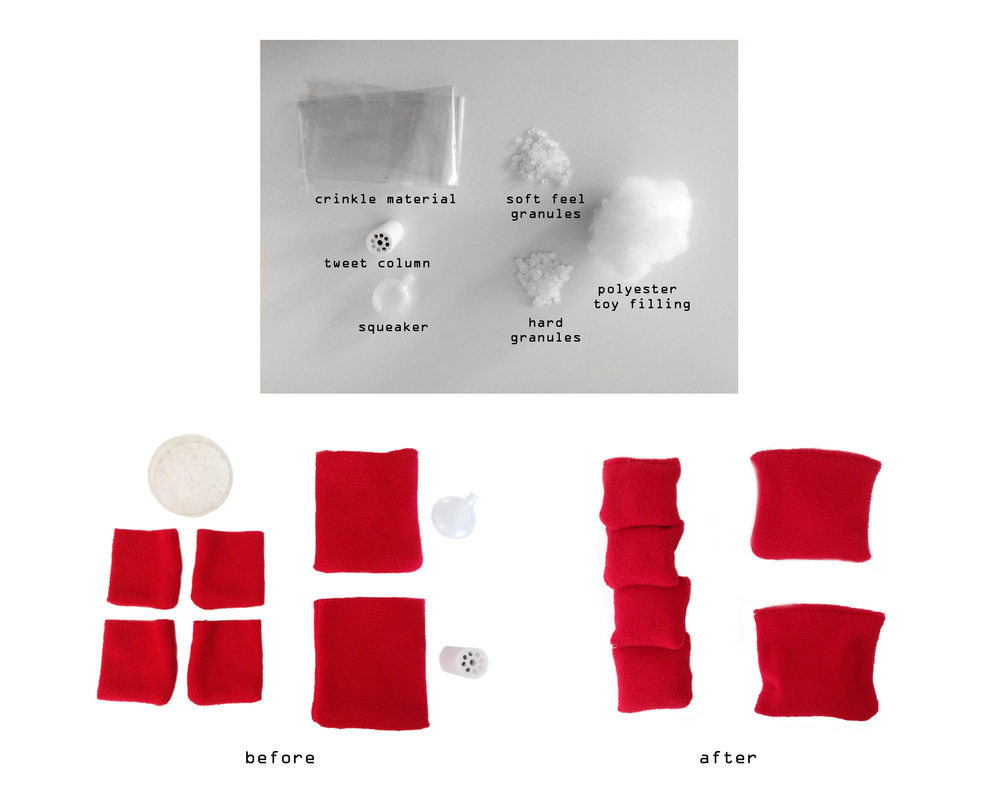
One of the major components I wanted to incorporate were sensory stimuli, involving sound, texture, and weight. This meant using noisemakers and different types of filling. To use them safely, I encased the noisemakers and granules in fleece pouches, then placed them inside the ladybug. I purchased crinkle material for toymaking but I’ve seen others replace it with cereal bags or candy wrappers rinsed out with soap and water.
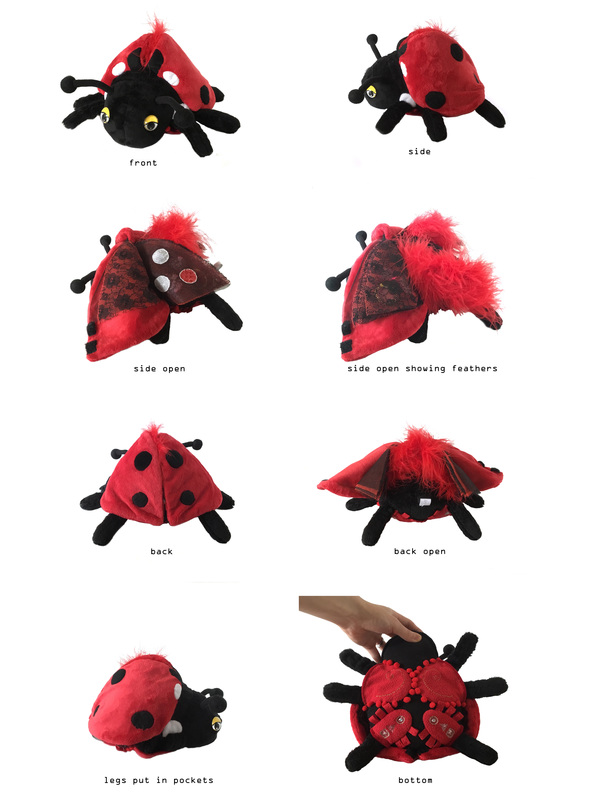
The final step was to attach the assembled pieces together. Here is the finished ladybug from different angles. I hope you like it!